String Easter Eggs (Easy Easter DIY)
Looking for a beautiful and easy Easter craft idea? These DIY string Easter eggs are a fun, creative way to decorate for spring! Made with simple materials, they create a delicate, lace-like design that looks stunning displayed in baskets or around your home.
This is the perfect Easter craft for kids and adults, whether you’re decorating, crafting with family, or making handmade Easter décor.
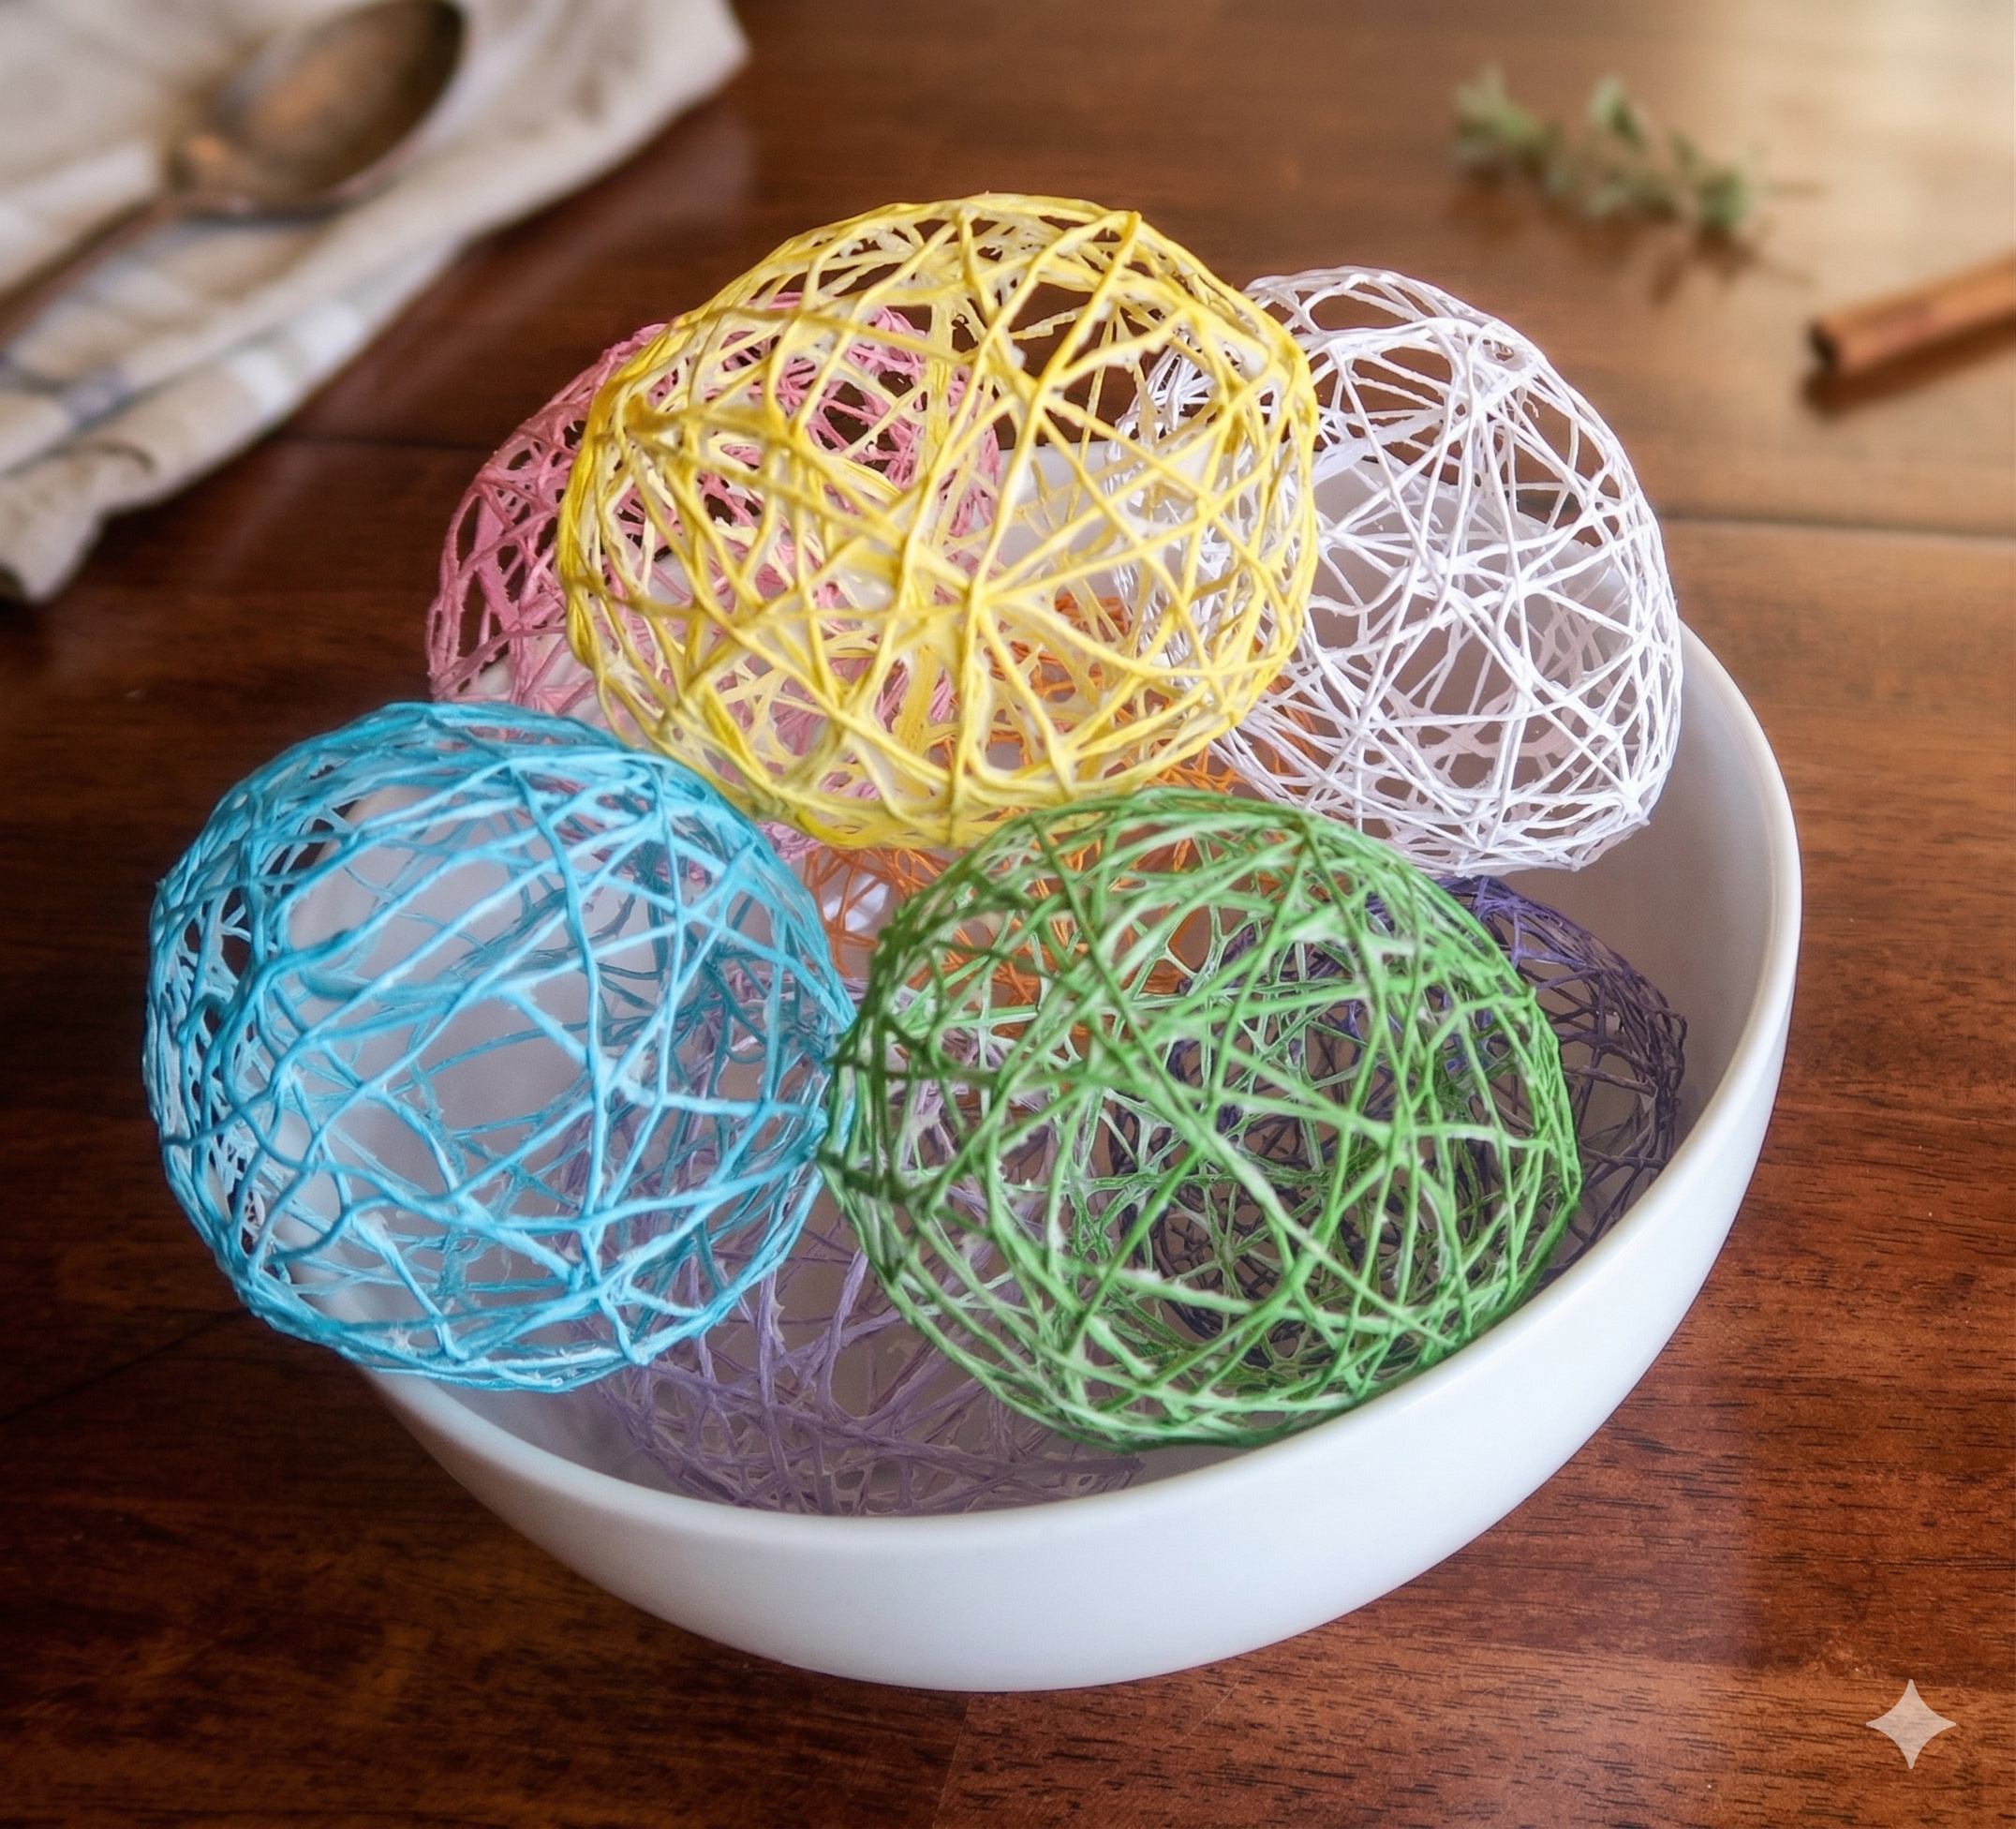
🎥 Watch the Video Tutorial
Want to see exactly how these string Easter eggs come together?
Check out the video below for a full step-by-step guide.
🐰 Why You’ll Love This Easter Craft
- Easy and affordable DIY project
- Beautiful homemade Easter decorations
- Great for kids (with supervision) and adults
- Perfect for spring home décor or Easter centerpieces
- Customizable with different colors and sizes
🧵 Supplies Needed
- Embroidery thread
- Water balloons
- 1 bottle of Elmer’s glue
- 1/2 Corn Starch
- 1/4 cup Water
- Pin
- Cooking Spray
- Bowl
- Toothbrush (optional)
✂️ How to Make String Easter Eggs
- Start by blowing up your water balloons, make sure they’re not too big.
- Make your glue mixture. You will need to add 1 bottle of glue, 1/2 cup of corn startch and 1/4 cup of water.
- Add your embroidery thread to the glue and make sure you don’t tangle it

- Spray your balloons with cooking spray
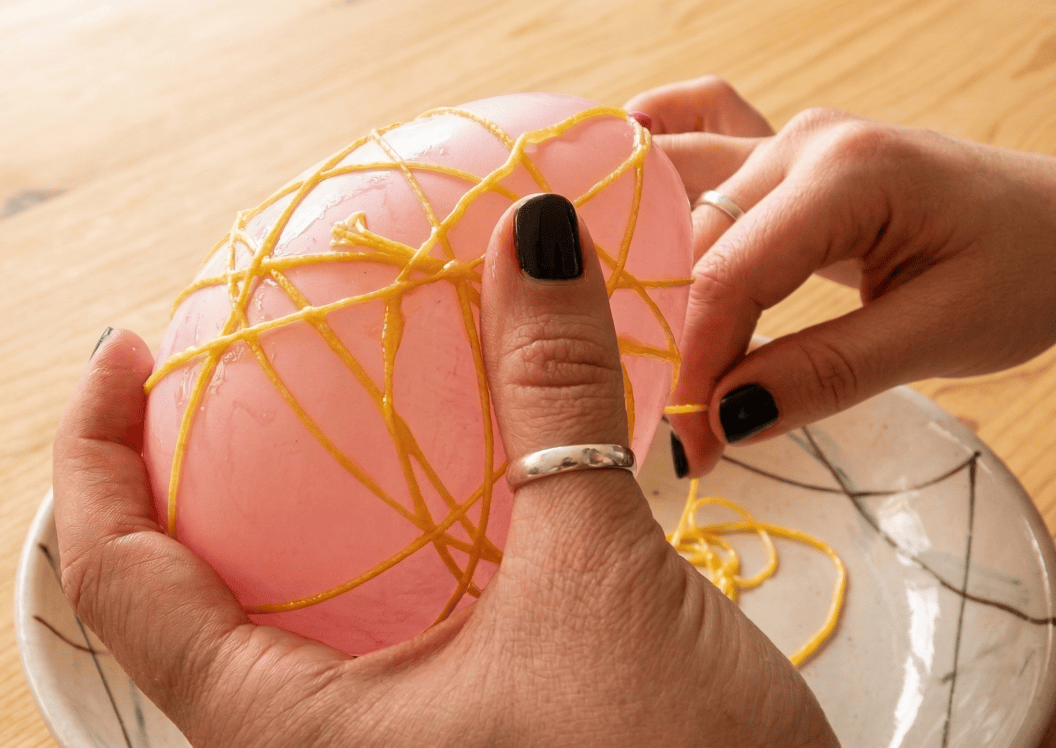
- Begin wrapping the thread around your balloon, you’ll want to squeeze off any excess glue from the thread as you do this. You don’t want to be symmetrical, so make sure the thread is crisscrossed all around the balloon.

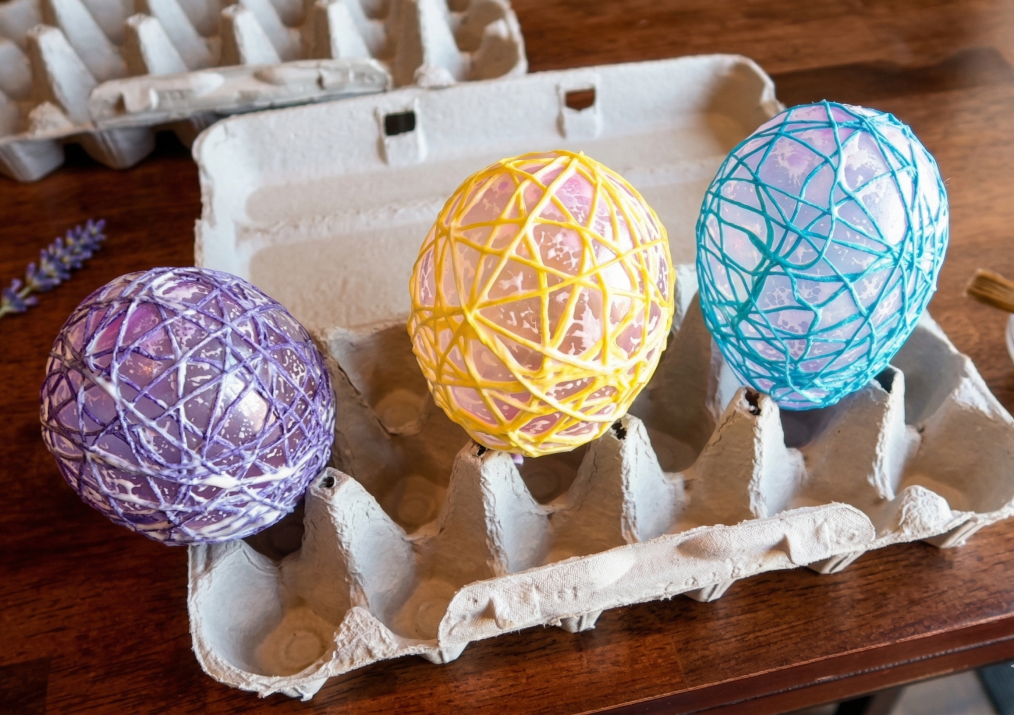
- Once all of the thread is wrapped around the balloon, place it inside of a cup or on a egg carton so it can dry. It’s highly recommended that you let this dry for 24 hours but if it’s hot out or it’s near a window, it will dry in 12 hours.

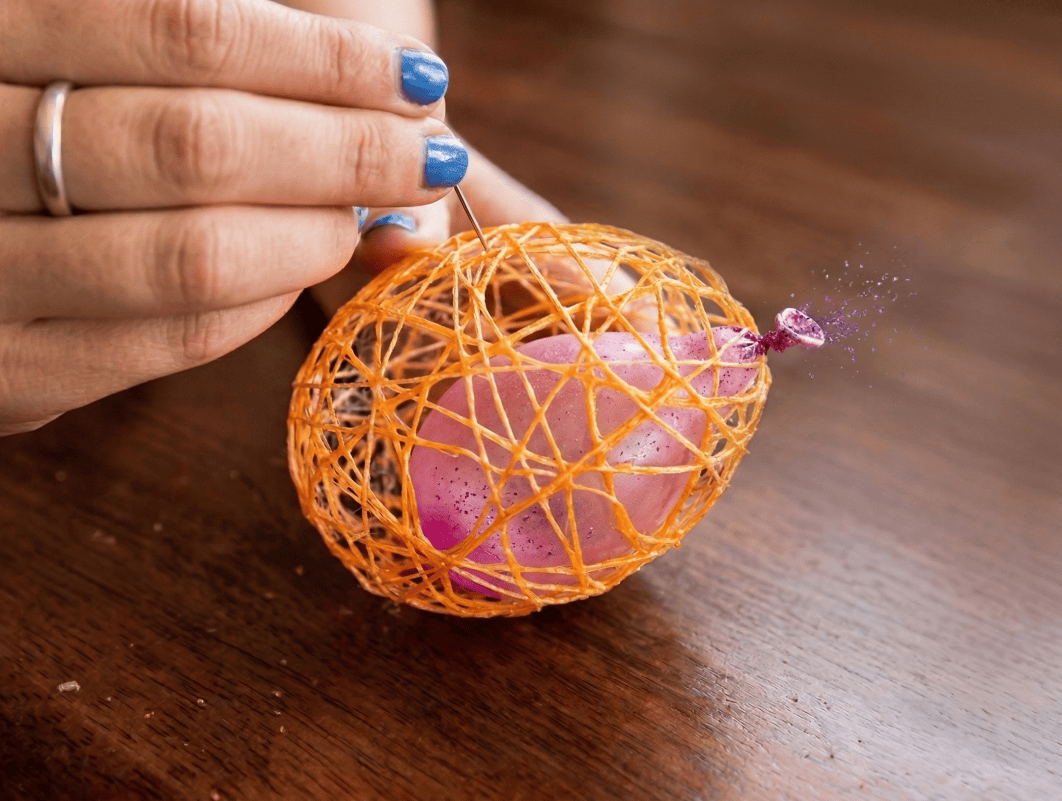
- Once the eggs are dry, pop the balloons with a pin and then pull out the balloon.

- You may have some remnants of glue left behind so you’ll need to poke it or brush it off with your finger. You can also use a toothbrush to get into all the small areas.

Now that you have your eggs complete you can place them in a bowl as a center piece, weave string or yarn through the tops and make a banner or turn them into a wreath.
🎥 Watch the Video Tutorial
🐇 Tips for the Best String Eggs
- Don’t over-saturate the string—too much glue can cause dripping
- Use different colors for a festive Easter display
- Let dry completely before popping the balloon
- Place wax paper underneath to prevent sticking
🎉 Fun Ways to Use String Easter Eggs
- Easter table centerpieces
- Spring home décor
- Easter basket fillers
- Hanging decorations
- DIY gifts
❓ FAQ: String Easter Eggs
How long do string Easter eggs take to dry?
Typically 12–24 hours depending on humidity and thickness of the string.
Can kids make this craft?
Yes! Younger kids may need help with glue and balloon handling.
What kind of string works best?
Embroidery floss or thin yarn works best for a delicate look.
How do I store them?
Store in a dry place to keep them from softening or losing shape.
🐣 Final Thoughts
These DIY string Easter eggs are a simple yet stunning craft that adds a handmade touch to your Easter décor. They’re easy to make, fun for all ages, and perfect for celebrating spring.
👉 Don’t forget to watch the video above to see the full process step-by-step!


